Many of my old family photos from the 60s through 90s were taken on Kodak Instamatic 126 film.
I found some old negatives and wanted to scan a few of them, and I ended up doing some experimenting and learning a few things.
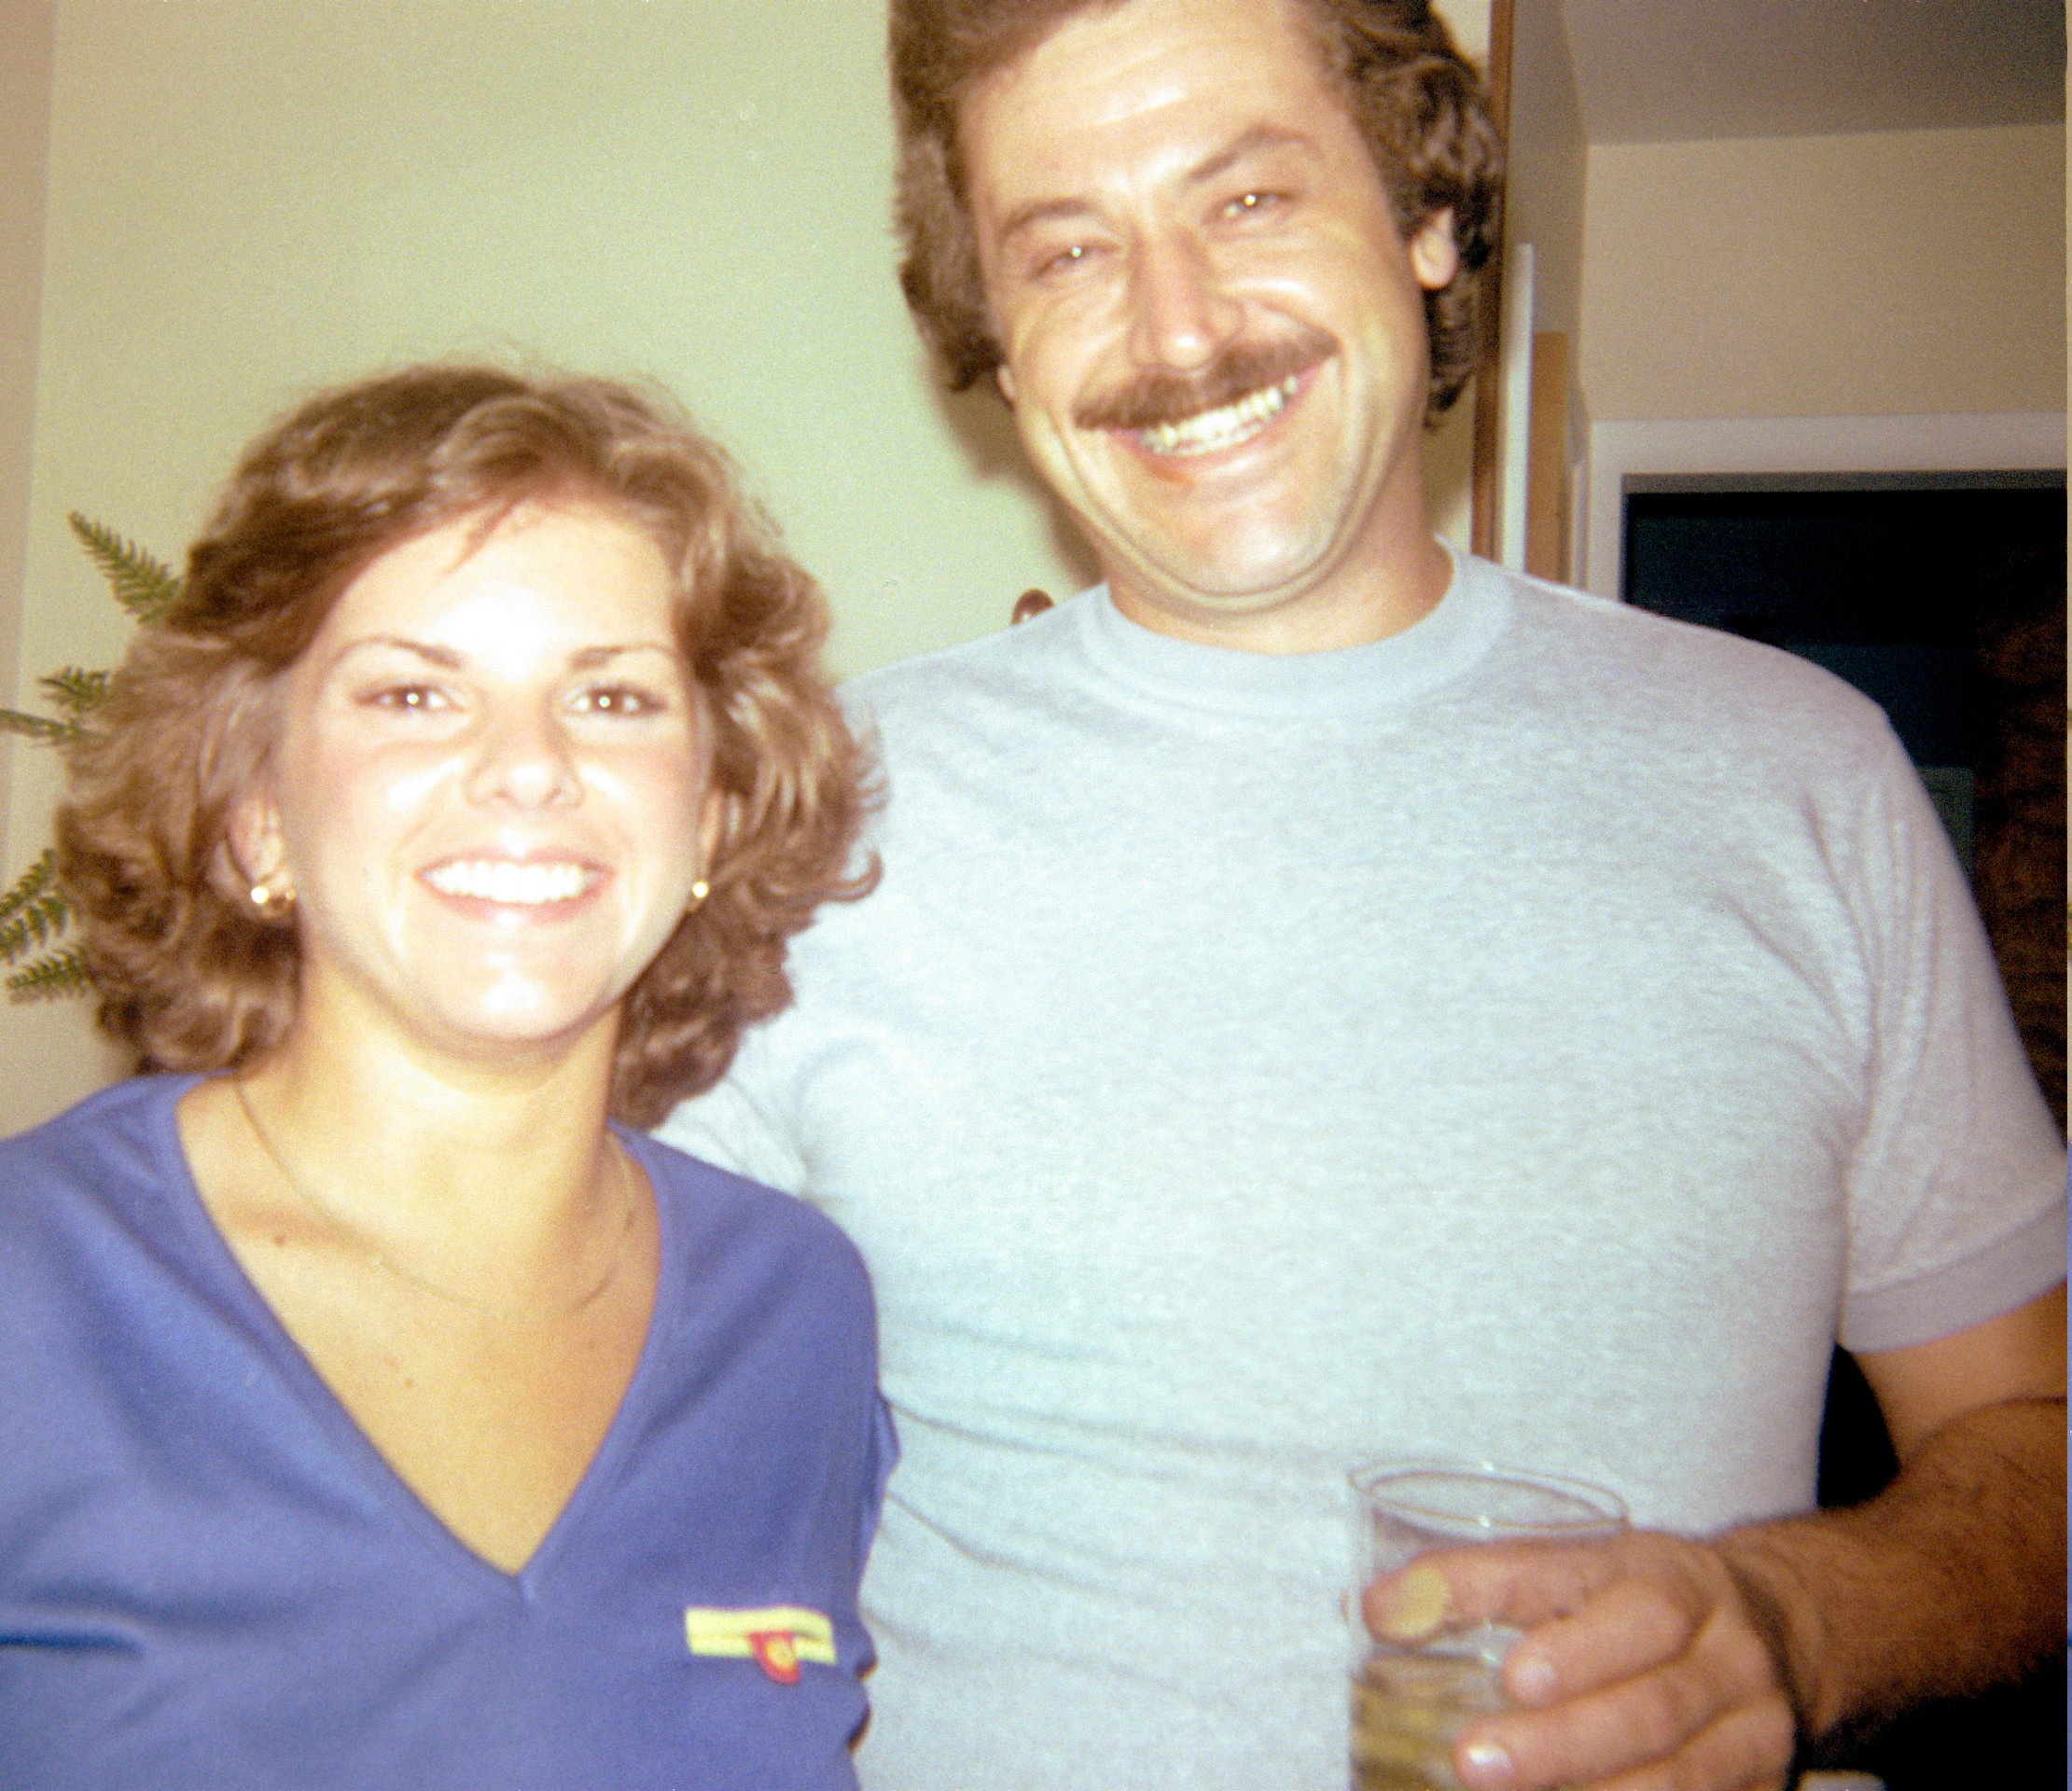
I have a 35mm slide scanner that makes excellent scans of both color slides and negatives, but it doesn't have a carrier for the square 126 frame format. It is possible to do scans, but each frame has to be manually aligned, and the top and bottom ~10% gets cropped off. Here is a sample,
I also have some older larger "Kodak Safety" film b&w negatives, 40mm and 60m square, so I was looking for a way to scan those, too.
I set a goal to try and get full frame scans of passable quality using whatever hardware and software I had on hand.
My first thought was to try scanning these on an HP office scanner in the flatbed, just to see if I could get some "draft quality" scans. I read that the results would be very poor, and confirmed by trying it myself - the scans were exceedingly dark. The problem is that, unlike scanning a solid print that reflects colors, when scanning film (color or negative) the light has to pass through the film, reflect off the cover, then back through the film before finally hitting the sensor, so the resulting scan is twice as dark relative to a backlit scan. Some photo scanners have a light source in the cover for scanning film, but my regular office scanner does not.
I read a few articles and got some ideas,
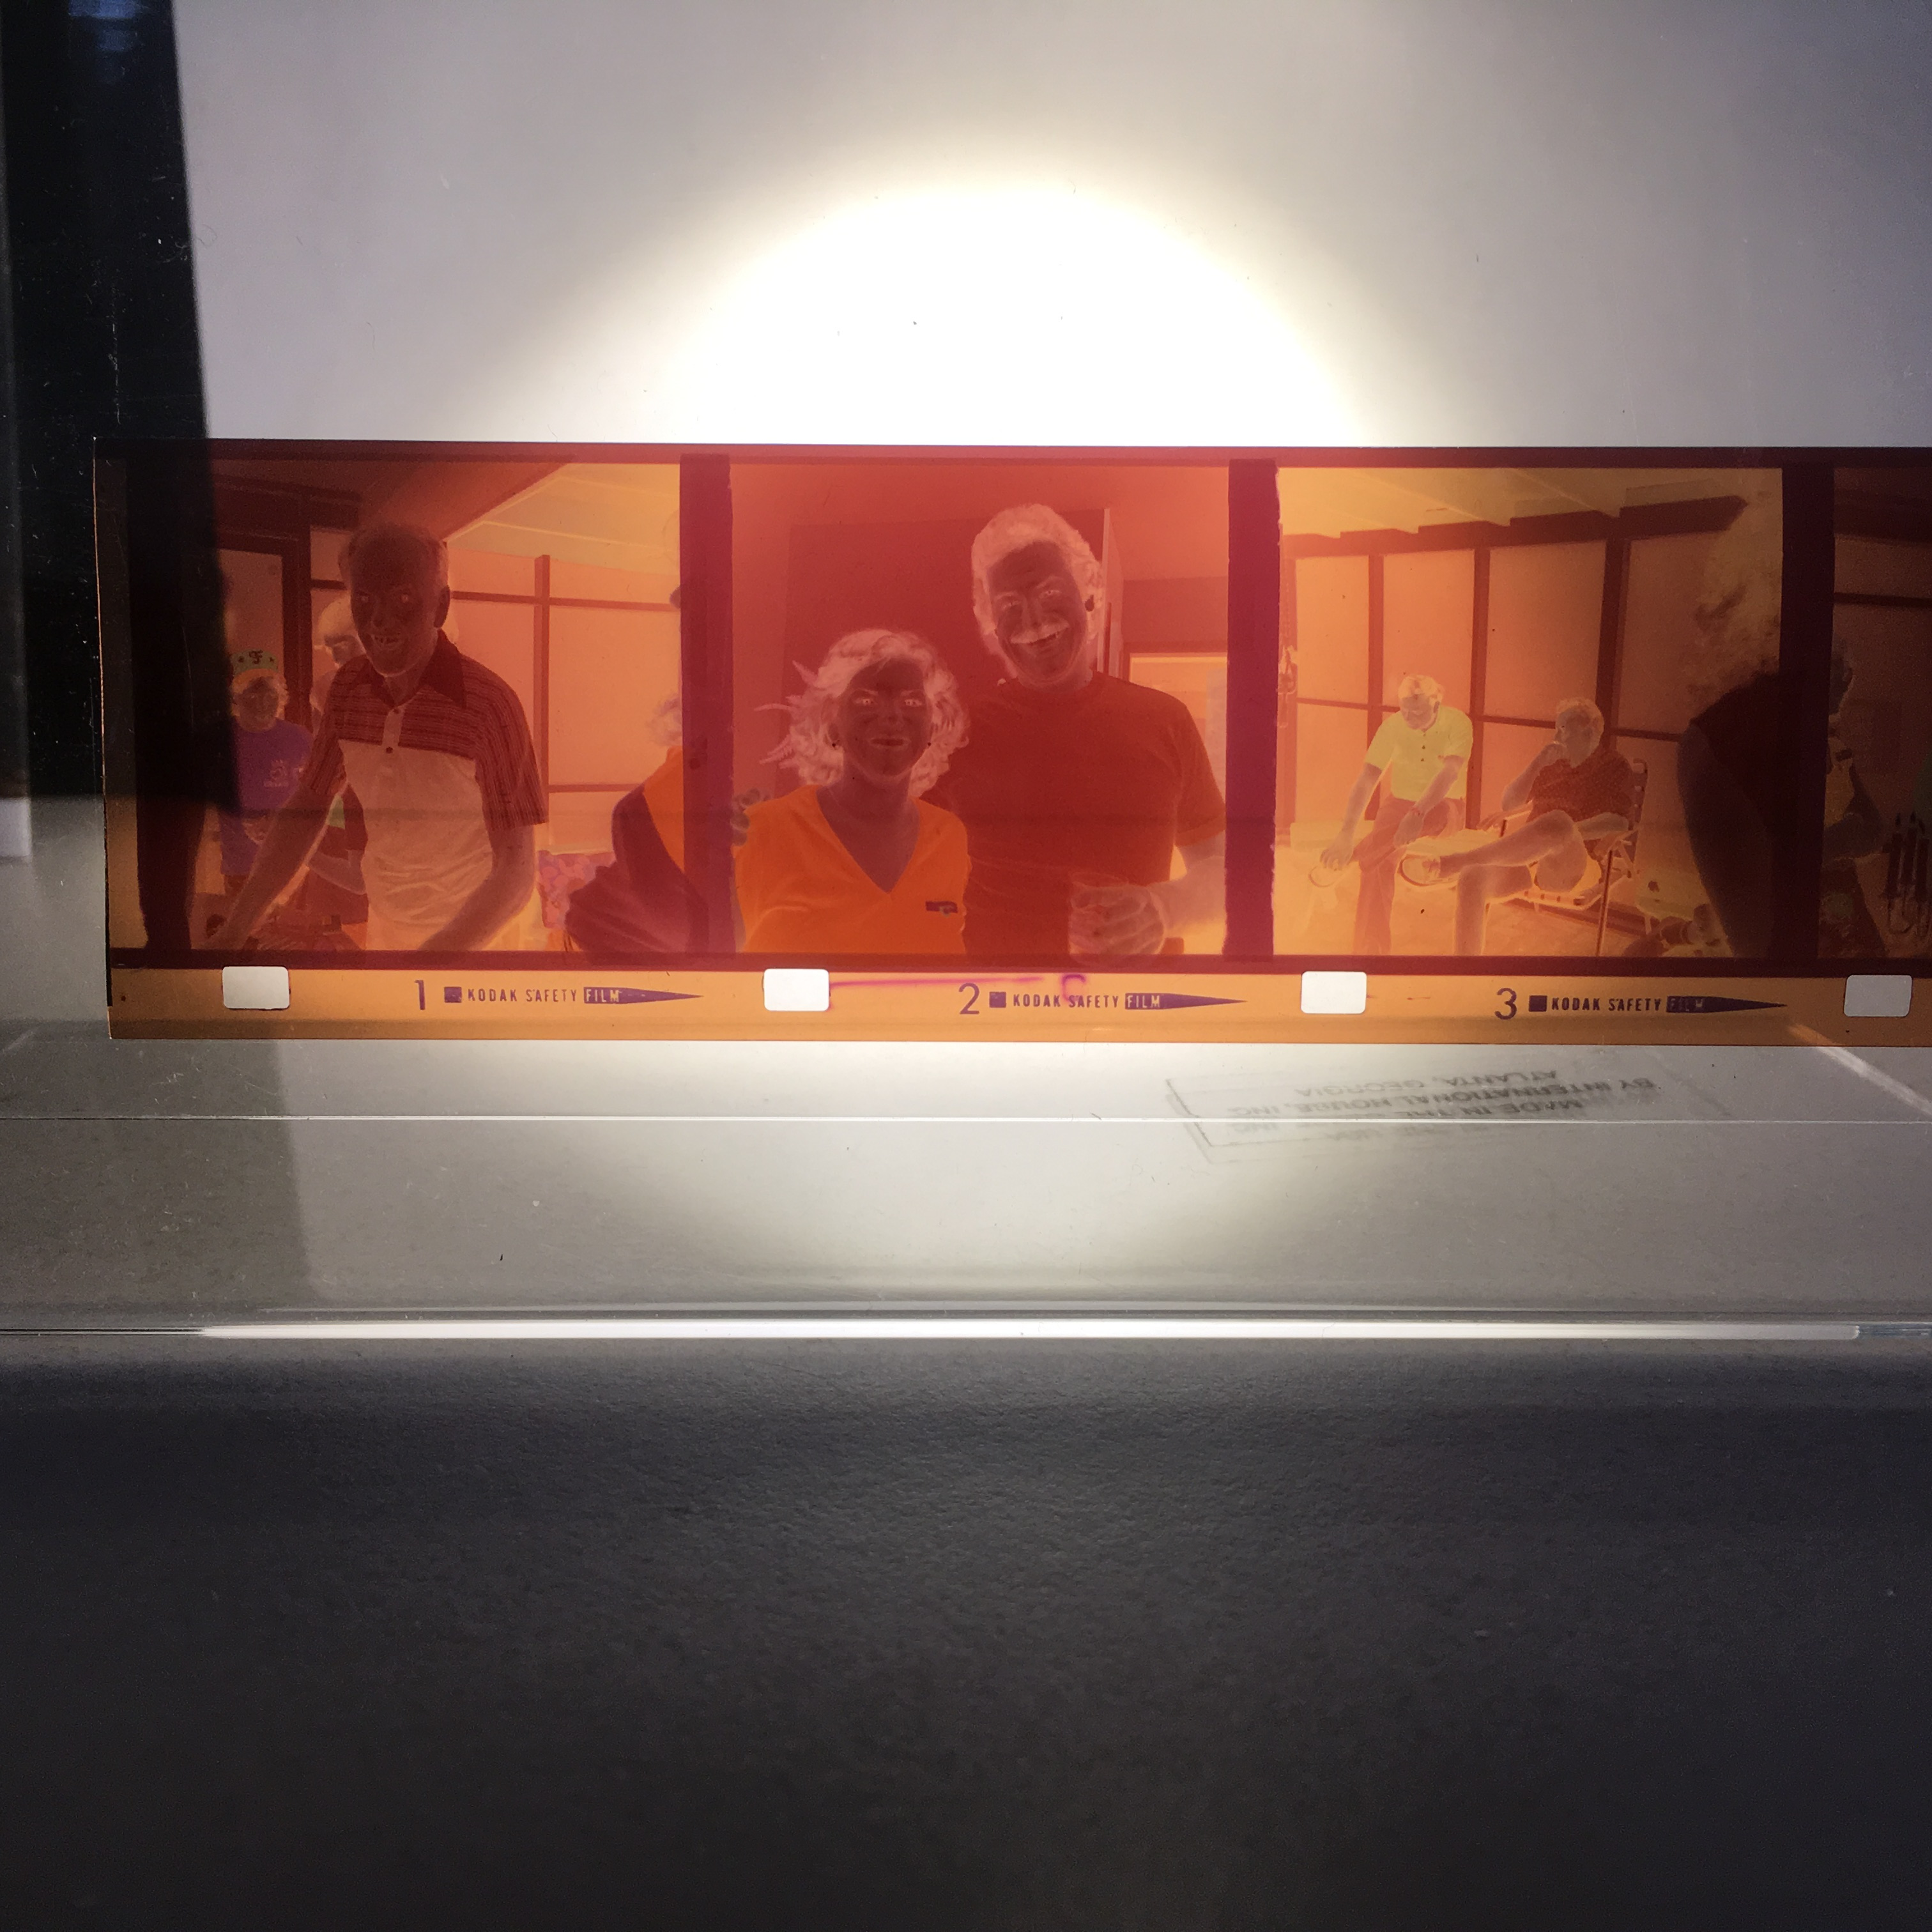
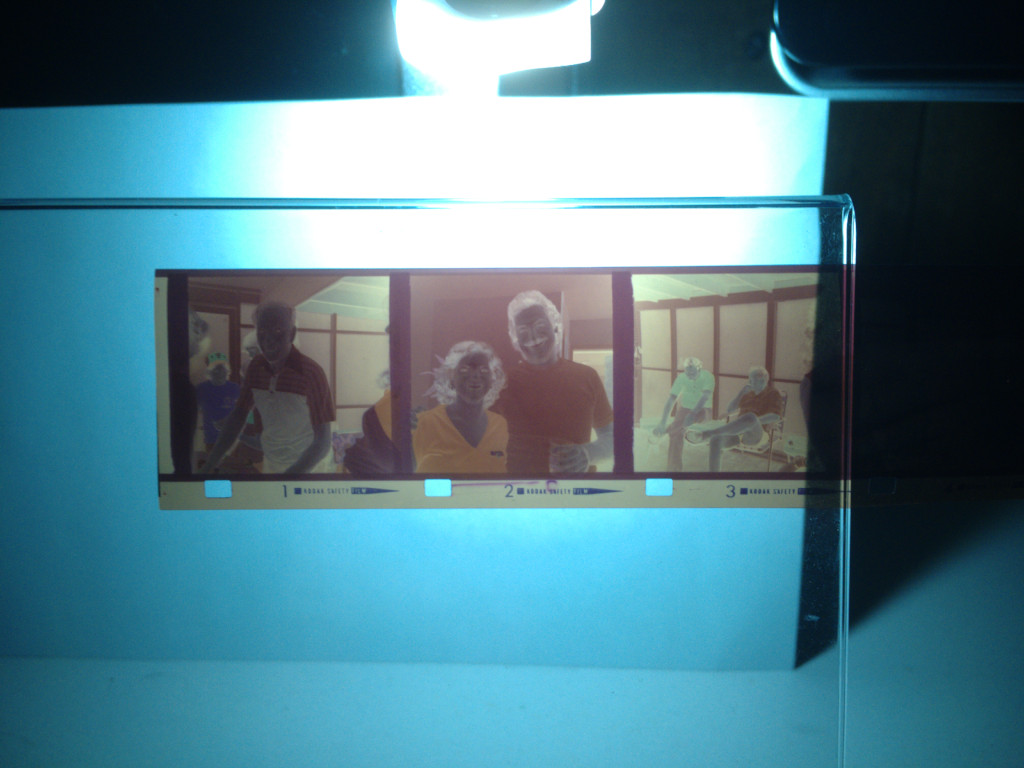
I decided to try a simple setup using what I had on my desk: a plastic photo frame, an Ikea LED lamp, a piece of plain white copy paper, and my iPhone SE. The light would reflect off the paper, though the film (only once), and into the camera sensor.
Here's what it looked like from the camera, with the same slide scanned above,
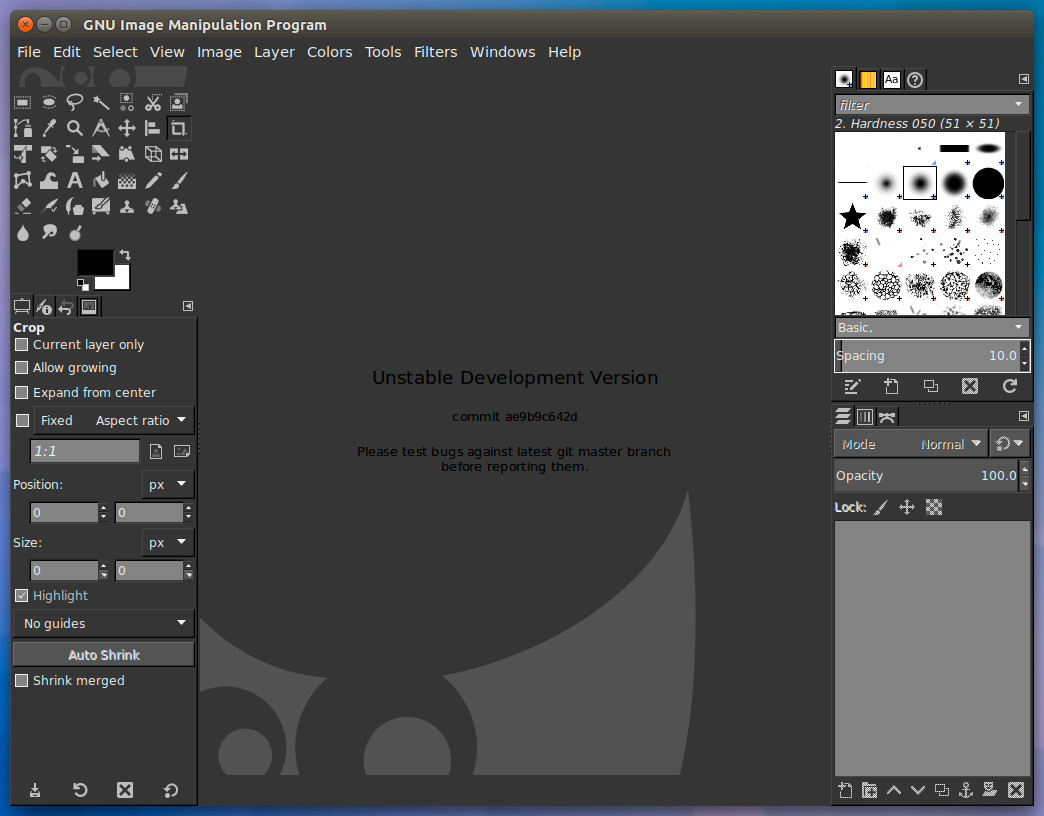
I loaded it in Gimp and used this procedure,
For reference, "Auto white balance" does something similar with levels, but I wanted to do things manually here.
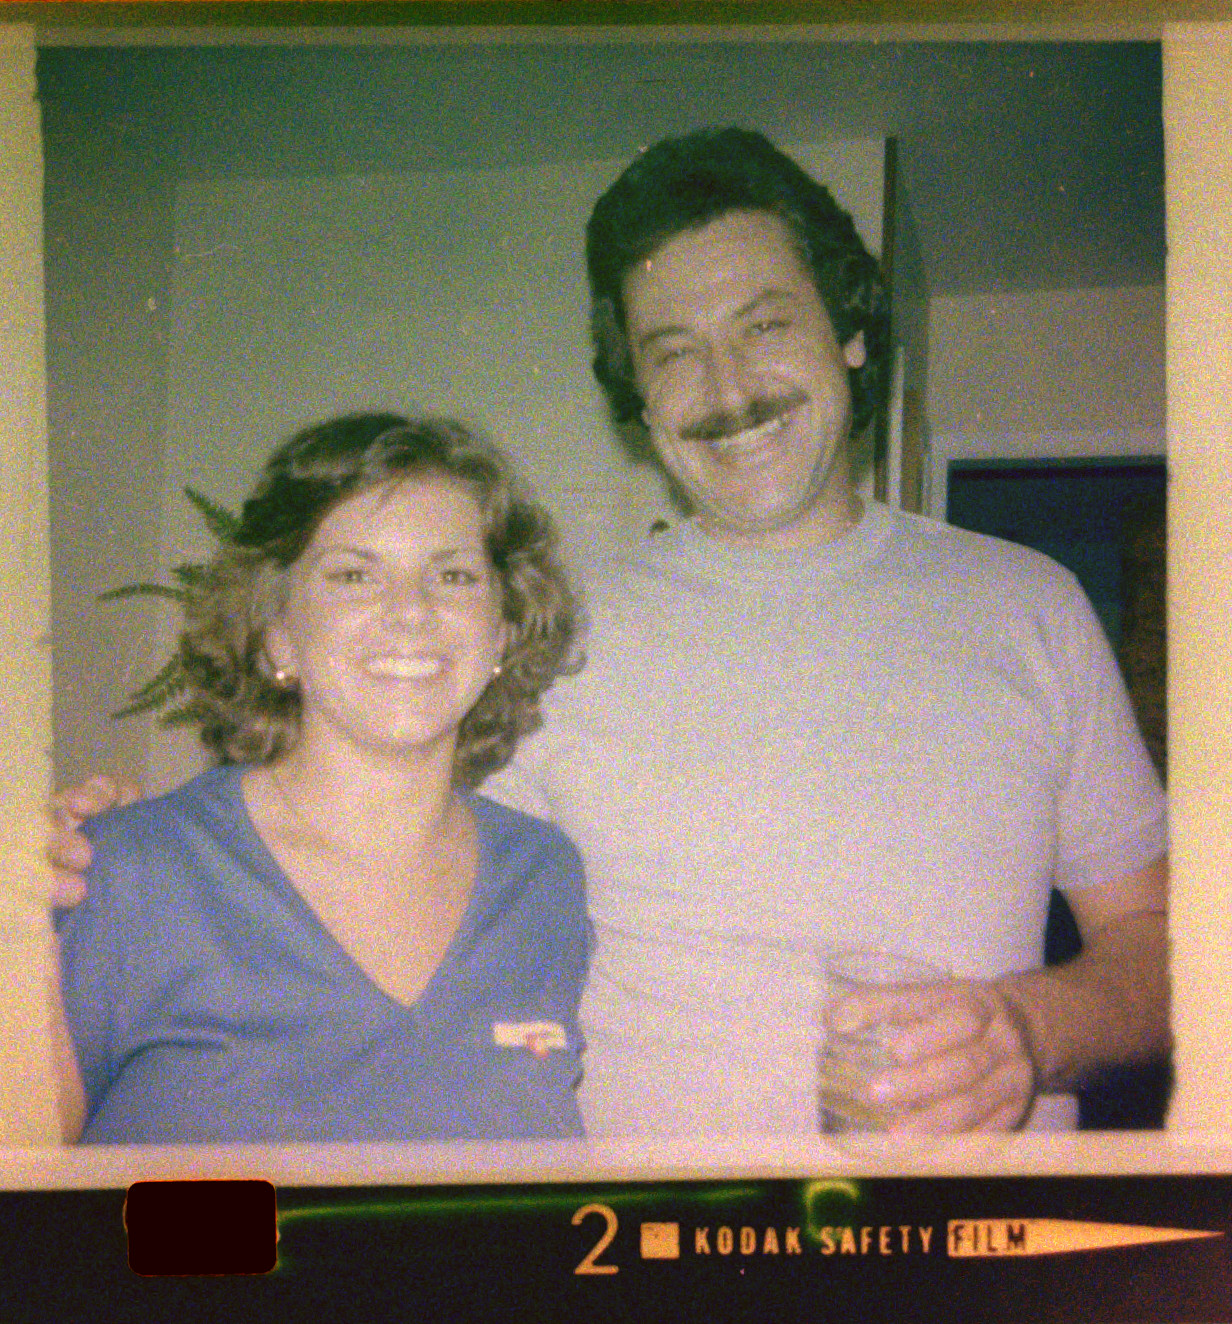
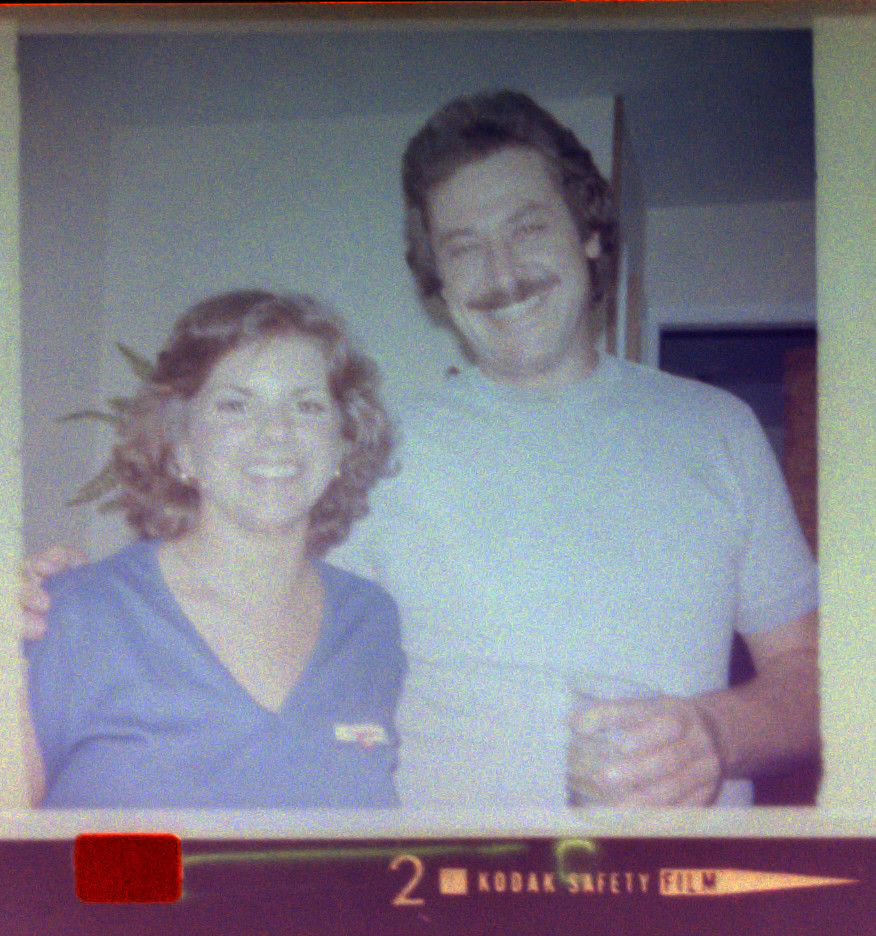
The result looked like this,

At this point, the quality is good enough that my family members would say "oh, I remember that day, what a nice picture!". Photography geeks would bemoan the poor colors and grainy appearance. I am somewhere in between. The picture makes me happy, but I know the quality could be objectively better.
I think the problem is that film negatives have limited dynamic range, and 8-bit RGB Jpeg loses too much information.
Maybe I could get better results with raw images? My iPhone SE is currently the best camera I own. I bought an app called "Halide" that takes raw images and saves them as DNG (digital negative) files.
Can Gimp support 16-bit color? 2.10 will, but Ubuntu 16 only has version 2.8.x.
I tried building from source, it required a bunch of dev package installations, and eventually balked because it wanted newer versions of a few things that are currently behind in Ubuntu 16 LTS.
I tried "flatpak" along the way, kind of a neat thing, but only has stable version 2.8.
What about a Docker build?
docker run -it --rm -e DISPLAY=$DISPLAY -v /tmp/.X11-unix:/tmp/.X11-unix -v /home/guinan/Downloads:/media/Downloads selu/gimp-develTIFF converter fails to load the dng file.
Trying another,
docker run -it --rm -e DISPLAY=$DISPLAY -v /tmp/.X11-unix:/tmp/.X11-unix -v /home/guinan/Downloads:/media/Downloads jarfil/gimp-gitThis is what it looks like running,
It wants darktable, but that isn't in the docker image.
Ok, I can use ImageMagick to convert DNG to TIFF,
convert IMG_3447.DNG IMG_3447.tiffThat takes about 20 seconds. Load it, and Gimp reports the image as.
RGB color 16-bit gamma interger, GIMP built-in sRGB, 1 layerRepeating the Tools and Image procedure above, it was more difficult to get good colors with the Levels tool, and there appears to be lot of sensor noise.
It is possible to get a cleaner image with these Halide settings,
But there simply isn't enough blue and green channel data captured to make a good picture. Hm, removing red leaves cyan. I tried taping a roughly cyan colored PostIt note over the LED lamp to try to get more balanced colors,
and set these Halide settings,
I got a more uniform distribution of colors, but the light is murky from the PostIt, and the auto focus doesn't work as well.
Overall, I like the conversion from 8-bit Jpeg the best! I should note that my manual level tweaking was purely seat-of-my-pants. Color science is a deep subject, one can even get an M.S. or Ph.D. in it. I'm just dipping my toes in a brook here.
I'm going to conclude this experiment for now, with the following notes,
jamie/other-pictures/scans/I want to note how I downloaded the image files from iPhone. I used an app called WiFi Photo Transfer. It runs a simple web server on the iOS device and lets you browse and download files from a browser on the local network. Great, simple, and no need to mess with iTunes or Apple's crummy proprietary protocols.
In the 80s and 90s, my Mom used a literal Mickey Mouse camera, one of several Instamatics we had over the years. She loved that camera because it was simple to use, and took decent pictures. She once told me a story of how the noisy winding mechanism turned lots of heads at a PGA tournament she and my Dad attended.